Linux is massive. We’re talking about 77,000 files, 1.1 million lines of C code, and a 2.7 GB download. Yet engineers worldwide still want to become kernel developers. This guide will help you get started.
You’ve probably heard that Linux powers countless operating systems—Ubuntu, Android, OpenWrt, Scientific Linux, and many more. It’s arguably the most important open-source project ever created, providing the foundation for modern software since the 1990s.
So why isn’t every developer clamoring to work on it? Simple: it’s hard. Really hard.
Most developers work on applications or libraries in high-level languages. These abstractions shield you from the messy details of memory management, filesystems, and device drivers. Kernel work strips away those safety nets.
To be precise, Linux is just a kernel—the tiny but critical bridge between your operating system and the physical hardware.
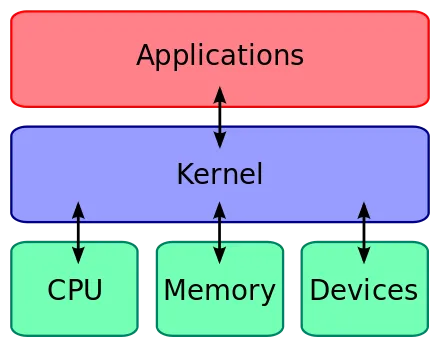 A kernel connects application software to the hardware of a computer.
If you’re equal parts crazy, curious, and cool—kernel development might be for you. Here’s how to start.
0. Know your motivation
Before you commit (no pun intended), you need to understand why you want to do this. Some compelling reasons:
- Work alongside some of the best programmers in the world
- Optimize or create drivers for yourself and others
- Tackle one of the most complex codebases on Earth
- Join a global community working toward a common goal
Once the romance fades and you know your motivation, set a small, achievable goal. Submit a simple refactor or documentation patch before attempting to write a driver.
1. Set up your environment
Kernel developers use Linux (surprise!). Install the necessary packages to build and send patches:
For Debian-based distributions:
sudo apt install -y \
    build-essential \
    libncurses-dev \
    bison \
    flex \
    libssl-dev \
    libelf-dev \
    git-email
For Red Hat-based distributions:
sudo dnf groupinstall "Development Tools" -y
sudo dnf install -y \
    ncurses-devel \
    bison \
    flex \
    elfutils-libelf-devel \
    openssl-devel \
    git-email
1.1 Configure your email client
Most developers use git send-email. Configure it in your .gitconfig file. Here’s an example for Gmail:
[sendemail]
    smtpEncryption = tls
    smtpServer = smtp.gmail.com
    smtpUser = <[email protected]>
    smtpServerPort = 587
You’ll also need to create an app-specific password in your Gmail settings.
2. Clone the kernel
Download the latest stable kernel. This will take a while:
git clone git://git.kernel.org/pub/scm/linux/kernel/git/stable/linux-stable.git \
    && cd linux-stable/
3. Build the kernel
You have the tools and the source code. Now let’s build it.
The kernel needs a .config file to determine which modules to enable. While you could create this from scratch, I don’t recommend it—there are thousands of flags. Instead, copy your existing system’s configuration:
sudo cp /boot/config-$(uname -r) .configIf you don’t have a config in /boot, try:
zcat /proc/config.gz > .configNote: You might need to configure some additional flags. At this stage, you can usually just hold Enter to accept the defaults.
Now build:
make -j$(nproc)4. Install the kernel
If the build succeeded, you now have a vmlinux binary—this is your kernel!
First, install the kernel modules:
sudo make modules_install -j$(nproc)Next, install the kernel to your boot directory:
sudo make install -j$(nproc)Finally, update your bootloader. For GRUB:
sudo grub2-mkconfig -o /boot/grub2/grub.cfgThat’s it. Reboot, and you should be running your freshly built kernel. Verify with:
uname -a5. Create a patch
Time to make your mark. You need to modify something and create a patch to share with the maintainers.
Finding a starting point is easier than ever. The Kernel Newbies and Kernel Janitors projects maintain a todo list for newcomers.
Once you’ve made a change, commit it normally with git commit, then generate your patch:
git format-patch HEAD~1This creates a file like 0001-my-commit-description.patch based on your latest commit.
Before sending, check your code style:
scripts/checkpatch.pl <0001-my-commit-description.patch>Fix any warnings or errors, amend your commit, and repeat. When clean, find the right maintainers:
scripts/get_maintainer.pl <0001-my-commit-description.patch>6. Email the patch
You’re almost there. The final step is sending your patch to the maintainers identified above.
But wait—this is your first patch, probably something small. Send it to the Kernel Janitors mailing list first for feedback before bothering the main maintainers.
Your patch file should follow this format:
From <commit-hash> Mon Sep 17 00:00:00 2001
From: Your Name <[email protected]>
Date: Fri, 19 Jul 2018 13:48:44 -0400
Subject: [PATCH] <subsystem>: <Short, meaningful description>

Brief description of what this patch does.

Extended explanation if needed (why this change, what it fixes, etc.).

Signed-off-by: Your Name <[email protected]>

---
<diff content here>
If your patch looks like this, send it to the janitors:
git send-email [email protected] 0001-my-commit-description.patchMaintainers are busy. Don’t worry if you don’t hear back immediately—wait at least a week before following up.
Congratulations! You’ve downloaded, built, installed, modified, and contributed to one of the world’s largest and most complex software projects. Take a moment to appreciate what you’ve accomplished.
This guide is just the beginning. Subscribe to the mailing lists, read the official kernel documentation, explore the Kernel Newbies resources, keep your goals small, and build up your skills gradually.
Happy hacking!